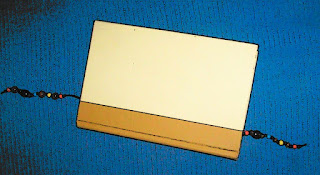
My last post was for a 3-strand, beaded necklace. I realize that, for some people, that kind of necklace may be a little complicated. So, if you’re still looking for a craft item that, with just a few skills, works up fast, then a beaded bookmark might be precisely what you want.
Your bookmark can be folk-inspired - like the beaded one described here - or made with a bit of glassy razzle-dazzle. Either way, it’s guaranteed to be a smart-look page holder and one that will add appeal to that book sitting on your bedside table. These markers are also quick gifts to put together and can be customized to include initials or themed charms for special occasions.

Everyone has the need for an extra bookmark. They also can be gift toppers on small or medium-size packages. Best of all, you can make your marker with whatever you have on hand in the way of scraps – any kind of bead and cloth, paper, ribbon, cord, etc. After you’ve planned your bead design, it should take you less than a half-hour to complete your work.
Things you'll need
Scissors
Heavy nylon cord (optionally, could be another material like a narrow ribbon or a cloth strip)
Beading needle (may not be necessary)
Wood or other beads that have an opening wide enough for threading
Metal or wood spacers, optional
Clear nail polish
Masking tape
Instructions
- Cut a 25-inch length of cord. Could be more or less length depending on the size of the book and the number of beads you want to add.
- Put nail polish on one end of the cord to allow for easier threading. Tape one end to a work desk using masking tape. Just beyond the taped down part, make a surgeons knot.
- Thread all the desired beads and spacers on the cord in the order that your design calls for.
- For one end, make simple, tight knots before and after all or most beads or spacers depending on the "look" you have in mind on one end.
- Leave enough cord in-between so that the bookmark ends will extend a bit beyond the cover of your book.
- Do the same knotting and placing of beads on the other end. Usually the two sides do not match, and one end has some larger, heavier beads. The fancier end will be the topside of the bookmark.
- When all the beads are placed, fasten the other end with a surgeon's knot.
-Trim away the excess cord on ends.
- Put nail polish on the end knots and final bit of cord so nothing comes loose or unravels.
All that done, and you're ready to admire your work. Just open your current book to the place you want to read the next time. The marker should be laid out close to the spine of the book. That way there's no damage to the book, and the beads are nicely displayed outside of the cover.
Related posts
DECORATE A T-SHIRT WITH CROCHET AND BEAD CHAINS
A FRAMED PICTURE COLLAGE MAKES AN EYE-CATCHING WALL DISPLAY
MAKE A FAMILY MEMORY BOX
A GIFT IDEA FOR A “CLOTHESLINE” WALL-HANGING MADE FOR A CHILD
DOING HANDICRAFTS IS USEFUL AND FUN
MAKING HEART-SHAPED PILLOWS FOR LITTLE GIRLS
MAKE BEAUTIFUL BEADS FROM RECYCLED PAPER
CREATE A PERSONALIZED, EMBROIDERED PICTURE FOR A CHILD

No comments:
Post a Comment